

There is something quietly humbling about taking a tray of Chelsea buns out of the oven, fully expecting to see a soft, sticky cluster of spiraled dough, but instead seeing a group of separate rolls that don’t want to stick together. Bakers say it doesn’t happen very often, but it does. The buns mostly look good. Some of them might even smell great. It doesn’t work right when you try to pull one away, though. Each bun is sitting there, a little off, a little dry, and a little off.
Why don’t Chelsea buns stick together? The real reason is that they make mistakes in many places at once. Most of the time, things go wrong at the filling. The sticky, sugary filling caramelizes a bit during baking, gluing the rolled layers together from the inside. This is one reason why Chelsea buns are supposed to stay together.
If the butter in the filling isn’t really soft—almost melting—before it’s spread, it will tear the dough instead of going across it. That means coverage that is thin and uneven. A thin cover means that there is less caramelization. When there is less caramelization, the buns bake on their own instead of coming together into the classic pull-apart shape.
The dough might not have been rolled out thinly or tightly enough either. When rolling enriched dough, it’s tempting to keep it on the thicker side, in part because it feels better and in part because the dough doesn’t want to be pushed. But a thick roll means spirals that are wider and have more air between them.
This space keeps the sides of buns that are next to each other from touching and sticking together in the oven’s heat. Experienced bakers seem to just know how to make Chelsea bun dough. It should feel almost like silk, slightly resistant but yielding, not like the tight, springy texture of bread dough that has been overworked.
The type of pan you use is more important than most recipes say. Chelsea buns need to be baked close to each other. Before they go into the oven, they should almost touch. If the tray is too big, each bun has too much space to grow outward instead of upward, so they never press against each other in a way that makes the sides come together.
Seeing gaps between the buns while they prove in a tray that is too big for them is usually a sign that they won’t stick. A smaller, deeper tray and placing the buns just slightly apart will fix a lot of this before the oven even comes into play.
Another cause that isn’t given enough credit is yeast failure. It’s clear from the sources that if the yeast doesn’t work right during the first proof, the dough won’t rise enough to push the buns against each other while they’re baking. It’s possible for the buns to be flat and not rise properly if the yeast is old, the milk is too hot instead of lukewarm, or the dough isn’t left in a warm place long enough. Many home bakers are still not sure what “warm” really means, but if you can hold your hand close to it without getting too hot, it’s probably good.
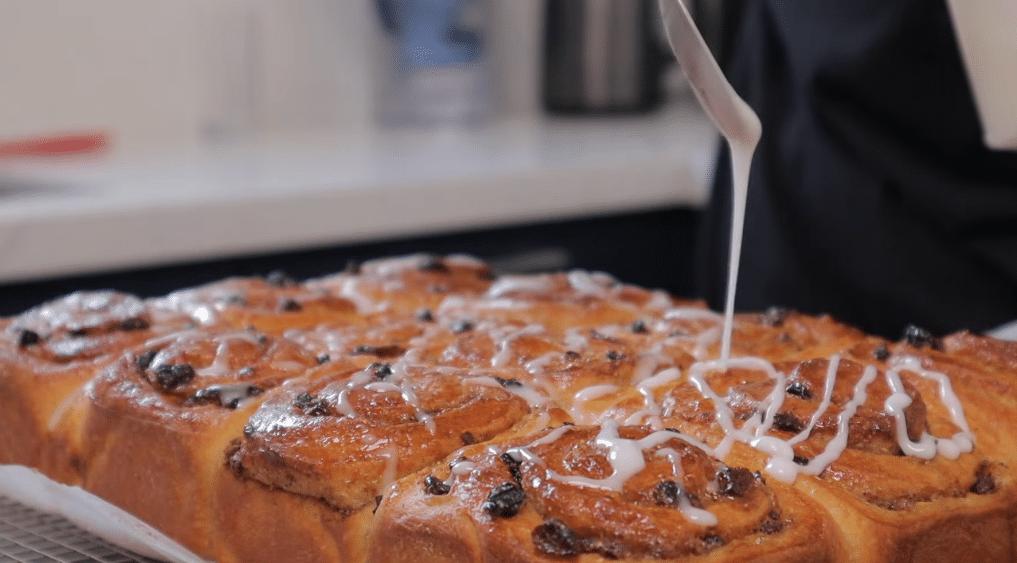
There’s also the glaze, which is usually just there for looks and not for strength. If you put the sugar syrup on the buns right after baking, while they are still hot, it sets into the surface and seeps into the spaces between the rolls, making a kind of soft glue. If you skip it or wait too long to put it on, your buns will look finished but feel unfinished. It’s hard not to notice how much this last step changes things, not just how they look but also how they feel—that classic sticky, cohesive feel that makes the whole experience what it is.
You don’t have to follow a recipe exactly to make good Chelsea buns. What matters more is knowing what the dough and filling are supposed to do. The fruit needs the sugar to keep it moist. The dough wants its neighbors to press down on it.
The glaze needs heat to work with it. A tray of tasty rolls can still fail to become what it was meant to be when those conditions aren’t quite met: the filling is dry, the roll is too loose, the tray is too big, or the yeast gave up too soon. Almost certainly worth a second chance. Important to understand first, for sure.
FAQs
1. Why did my Chelsea buns not stick together after baking?
The filling was too dry, or the buns had too much space between them.
2. Does the baking tray size affect how Chelsea buns stick?
Yes — a tray too large prevents buns from pressing together and bonding.
3. What role does the glaze play in keeping Chelsea buns together?
Applied hot, it seeps between buns and acts as a soft adhesive.
4. Can bad yeast cause Chelsea buns to separate?
Yes — poor yeast activation prevents the rise that pushes buns against each other.
5. How tightly should I roll Chelsea bun dough?
Roll it thin and tight so spirals compress together during baking.
